Raspberry Pi "Arcade Machine"
Like any normal person who happens across a pair of broken PS3 arcade sticks and a Raspberry PI 2, I decided that it was time to create my own arcade machine.To preface this, I am a software engineer at Sphero and I work on toy robots. Despite what you think this may imply, I have minimal hardware experience. So rather than a tutorial on how to make your own PI arcade, I decided to document my attempt and the mistakes and backtracks I went through. The end result is that a) it works and b) I didn't follow any other tutorial/make a joystick quite like any of the other ones!
I started out with a Street Fighter fight stick. I was told that the board was "burnt out." After a short attempt to utilize it as a PS3 controller, I immediately severed the connections to the PS3 controller board and ensured I kept the wiring order with medical tape. I will never use medical tape again!
I then decided to wire the joystick directly into the GPIO ports on the PI. At this point, I was experimenting with my original PI as the PI 2 was busy being an amateur web server. I came up with this wiring diagram:

After a long period of tinning cables and plugging them into a breadboard, it was time to hook it up to the PI! There were two key problems:
1) I didn't know how to do anything with GPIO ports.
2) I didn't have any way to plug anything into the GPIO ports.
I eventually found a GPIO based joystick project and adapted to their wiring diagram (it turns out that some of the pins are special, so you shouldn't use them for general I/O).

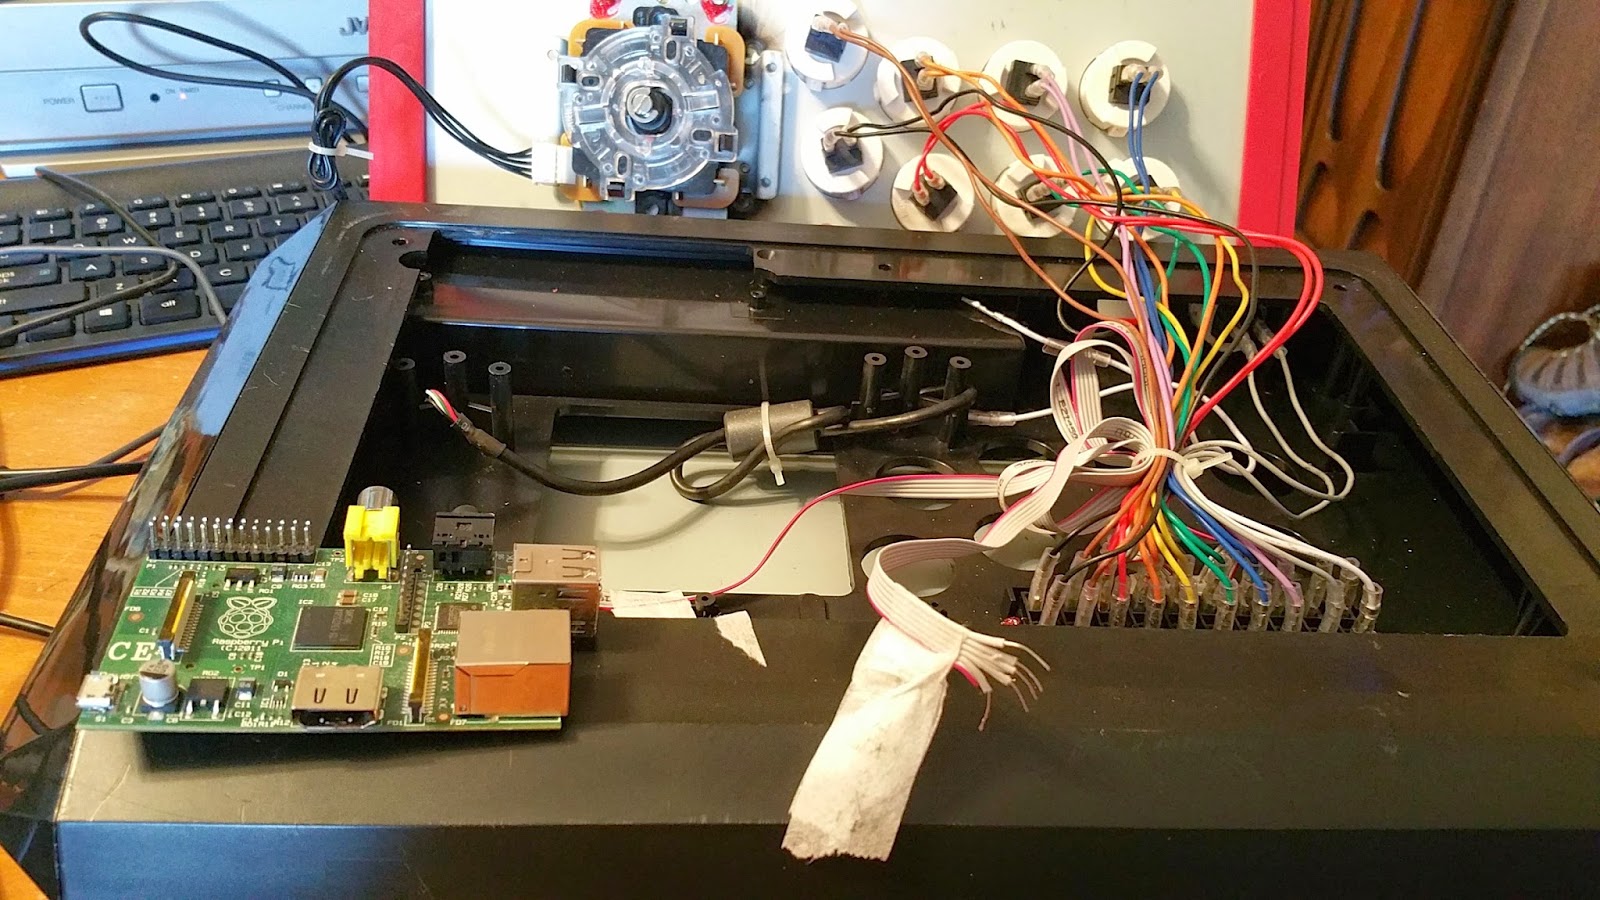
As far as wiring it up, after a bit of a panic I discovered that I still had a single floppy disk ribbon cable buried deep in my closet. That led me to this horrible tangle:
.jpg)
And to top it all off, I could only get the joystick to register down and right! It took quite a bit of time fiddling with the software before my trusty multimeter told me that those directions weren't being registered on the stick at all. It's a good thing I have two!
At this point, I started realizing that it's actually quite complicated to deal with joysticks under Linux. I started searching for a simpler solution. I discovered an Adafruit project, and immediately forked it and reconfigured the pins for my own use.
I also needed to start thinking of a more permanent solution to my final wiring. I didn't want to waste a bunch of my nicer breadboard wires by loosely plugging them into a floppy disk ribbon. I also managed to ruin a HDD ribbon cable trying to cut it up for use (which is why I just dealt with the twist you see in the floppy ribbon). I found a nice GPIO breakout cable from Sparkfun. This has the additional bonus of reordering the GPIO pins to be in numerical order! But, since the traces jump all around, and I can't fit the ribbon cable on the proper side of the GPIO pins, I had to disconnect my PI2 from the internet and use it instead (it's a good thing it isn't still running this blog!).
The Raspberry PI 2 jump actually halted me in a more significant way: I no longer had a built in RCA video out jack on the board! After a brief bout of disappointment, I grabbed a camcorder adapter from Best Buy. This mostly worked... mostly, but the important thing to note is that the red and yellow wires are actually swapped!
So here you have it, I'm now working with the Sparkfun breakout board and a suitable camcorder RCA adapter. Bonus: I no longer need the Jambox to hear the games! I just need the Jambox to jam.

(My fork is available here, it's just a few pin/key changes)
At this point, I have an issue: there is a USB cable going out of the back of the controller, but it went straight into a non-functional PS3 board. Additionally, I had a separate cable going into my PI. After a few minutes with the multimeter and a soldering iron, I had this awesome charging solution:

Next came cleaning everything up, luckily for me, there is a little door in the back to stash the USB cable. Lacking any sort of precision cutting tool, I take my Ikea cordless drill and makes what amounts to the ugliest giant hole to route cables through.
After a lot of haphazard drilling and jamming components where they barely fit, I can close everything off and turn it on!

The final hardware setup is this:
1) there is a Raspberry PI shoved very haphazardly into the top left corner of the arcade stick.
2) there is a second lower level in the stick where I wedged the breakout board.
3) in the PI's USB ports I have a Wifi dongle, BLE dongle (I do work for Sphero!), and a cable snaking out to a USB Micro adapter.
4) I have a camcorder 1/8" to RCA adapter, this means that the yellow and red wires are swapped! I considered running an HDMI cable, but if I can't connect it to an old-school CRT television, what's the point of even doing this?
5) At the end of the USB adapter, I typically keep a USB hub. And interesting side effect: if I don't have a USB power adapter handy, I can actually plug the PI's power into this hub and it will comically "power itself" (there is an external AC adapter I also keep with this hub).
Additional hardware "fixes" I want to make:
1) I'd like to wire in a battery to make it more portable.
1) I'd like to wire in a battery to make it more portable.
2) I want to use the hole in the top to mount the PI externally. This would mean that I could use an HDMI cable when I was forced to use a modern TV, and I'd have access to the one unused USB port!
I will dedicate another post to my PI software setup (I currently need a keyboard to type "startx" and to press "esc" - so I'm not comfortable posting it yet). But what you need to know is that I use:
1) Raspian OS
2) Adafruit Retrogame - which I set to run automatically